Copic Coloring

Blowing Kisses Valentine Shaker Card 2018 | Copic Markers

Hello!  Thanks for visiting my blog!  Here’s yet another Valentine’s Day Card in my 2018 series.  I’m using the cute MFT Stamp called Blowing Kisses.  It’s the latest Pure Innocence girl–isn’t she darling!!

Image15

I stamped her onto a piece of 80 pound Neenah Solar White cardstock, so I could color her with Copic markers.  I’m enjoying using this lighter weight cardstock for my Copic coloring.  I believe the inks do blend together better within the fibers of the paper.  I have the colors I used listed at the end of this blog.

Image7

Coordinating dies make cutting out images so quick and easy.  However, she wouldn’t be too hard to cut out with scissors.

Image8

To create the shaker, I’m using MFT’s heart shaker pouch.  I have never tried these before, and I’m really loving them!  They are so thin, but they hold a lot of sequins.  I added Scor-Tape around the edges of the pouch–I’ve seen others just use their tape runner.  I cut out my panel with the coordinating faux stitched die, and popped my shaker window into place–so easy and fun!

Image9

I added more Scor-Tape on the other side of the pouch, and then I could add all the pretty sequins.  I place a small piece of cardstock over my heart to seal in all the shaker bits.

Image10

Then I started adhering my card together.  I propped up the shaker panel with some foam tape and centered that on the front of my card base.  I added a scalloped frame around this card panel, but I didn’t add any dimension to that.  I did add a double layer of foam tape behind my stamped image so that she would be the same height as the shaker pouch.

Image11

I heat embossed the sentiment onto two strips of black cardstock with white embossing powder.  I also cut out a strip of black and white pattern paper to add some interest under the sentiment strip.  I adhered those with some Tombow Xtreme tape runner.  I ordered some more of the tape runner I usually use–Kokuyo–and haven’t received it yet, so I picked up this Xtreme tape runner at my local craft store.  This tape is really strong, but I had to press the cartridge down really hard to get it onto my paper.  Overall I really liked it, especially its adhesion strength.

Image12

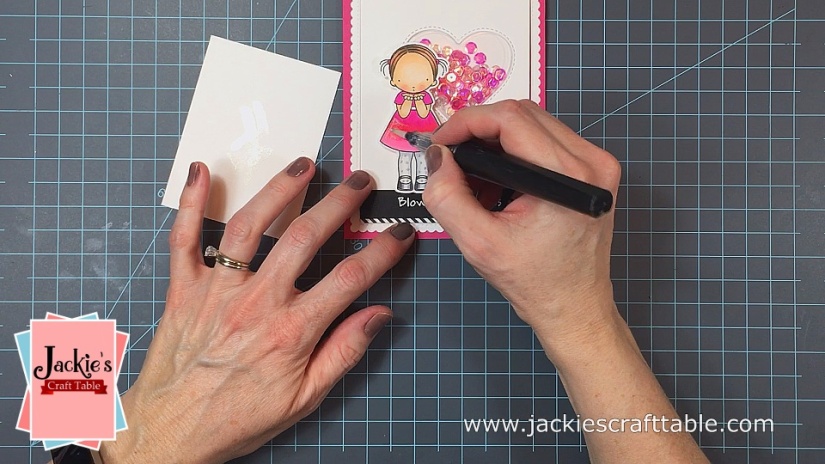
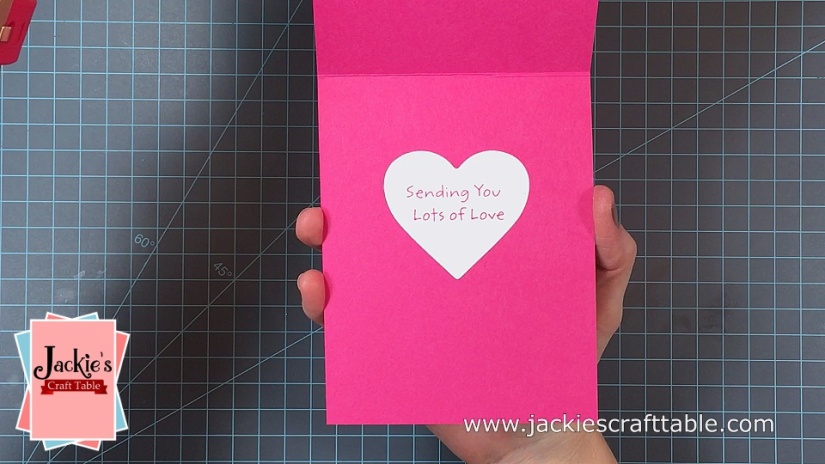
I decided to use the left-over heart to decorate the inside of my card, so I stamped another of the sentiments from this set onto it.  I added a little bit of sparkle brush over the girl’s dress and over the scalloped edge of my card and called it done!  I love all the white space on this card–it really makes the little girl image and the shaker pouch pop!

Image14

Here is my card video!  You can watch it here or on my YouTube Channel in HD.

Hope you have a wonderful week!! Bye!!

Supplies:

Copic Markers:

Skin: E000, E00, E30, R11, RV21

Hair: Blick 086, Blick 002, Copic E13

Dress: RV02, RV04, RV06

Tights: C2, C00

Shoes: C7, C4, C1

GellyRoll Metallic Silver Pen

Razzleberry Cardstock MFT

Razzleberry Dye Ink MFT

Nenah Solar White 80 & 100 pound

Xtreme Tombow Tape Runner

Strawberry Burst Sequins PPP

Assorted Moonshine Sequins SSS

MFT Blowing Kisses Stamp

MFT Blowing Kisses Die

MFT Scallop Edge Frames

MFT Black & White Stripes pattern paper


Uncategorized

One-Layer Viking Valentine’s Day Card & MFT Haul

Happy Friday!! I have a fun one-layer card for you today using MFT’s new stamp called Viking.  Isn’t he adorable?!  He took a long time to color in, but I had a lot of fun figuring out how I wanted him and the scene behind him to look.

Image6

I stamped him right onto my grey card base using my Mini Misti.  The cardstock did stick out of the top, but that didn’t interfere with my stamping.  I made a point of leaving the stamps on my Misti door so that I could restamp it after the coloring was complete.  The colored pencils do obscure the inked lines, so it’s nice to crisp them up after the coloring is finished.

Image1

I have all the Prismacolor pencil colors I used on this cute guy listed below.  I went back and forth between my colored pencils and my Gamsol.  I used lots of layers and applied them gently so I didn’t damage the tooth of the paper and create a waxy bloom.

Image2

For my background scene,  I wanted to draw in a castle wall behind him.  I blended on some Distress Ink called Hickory Smoke.  I wasn’t concerned to apply it smoothly because I wanted it to look rough and distressed.  I also use Mowed Grass Distress Ink for the grass.  Next, I sprayed the front of my card with water, waited for half a minute, and then blotted it up with a paper towel.  It left behind this fabulous mottled look for my stones.

Image3

I allowed my card to dry completely before I continued on with my coloring.  I used various shades of warm grey pencils to draw in the castle wall behind him.  I wanted the wall to fade out as it reached the sides of the card.  I didn’t add too much detail to the wall because I wanted all the focus to be on the fun Viking.

To complete the card, I also added some detailing to the Viking’s fur coat and beard, as well as to the grass and stones.

Image5

Here is the video I created for this card!  You can watch it here or on my YouTube Channel in HD.

Thank you for visiting my blog!  Hope you have a wonderful, crafty weekend!!  Bye!


Supplies:

MFT Viking Stamp

SSS Fog Cardstock

Prismacolor Pencils

Copic Multiliner 0.3 Tip

Mini Misti Stamping Tool

Gamsol – Odorless Mineral Spirits

Distress Ink – Hickory Smoke

Distress Ink – Mowed Lawn

Prismacolor Pencils used to color in the Viking:

Skin: Peach Beige, Rosy Beige

Beard: Terra Cotta, Pumpkin Orange, Cadmium Orange Hue, Yellow Ochre

Fur Coat: Burnt Ochre, Chesnut, Dark Umber, Yellow Ochre

Shirt & Grass: Apple Green, Grass Green

Pants: Sand, Yellow Ochre

Boots; Dark Brown, Dark Umber, Terra Cotta

Hat: Terra Cotta, Sunburst Yellow, Deco Yellow, Ginger Root

Shield: Permanent Red, Crimson Red, Various Warm Greys


Uncategorized

Gem Watercolor Birthday Card

Happy Monday to you all!  I hope you had a great weekend!  This weekend I tried out my new Gem Watercolors from Gansai Tambi, and I love them.  What started out as a simple watercolored card turned out kind of involved–I kept adding more and more to these cards.  I was in the crafty zone just having fun.

To begin this card, I powdered up my black cardstock panels with some EK Success Tool–this antistatic powder is a must if you don’t want your embossing powder to stick outside your stamped images.  I used Versamark ink to stamp out these flowers, then poured on my white embossing powder.  I love how the white embossing powder pops off the black cardstock!  I didn’t mask my images this time; I wanted to try to brush the unwanted embossing powder away.  It worked okay, but I think next time I would use masks over my images.  As an afterthought, I could have used a white gel pen to fix these lines as well.

Image2

Some of the stamps in my Hampton Arts flower set were solid stamps.  I wanted to add more greenery, so I used pigment ink to stamp them out.  I will add the color over the pigment ink later with some colored pencils.

Image3

The best part of creating this card was when I got to paint with these beautiful gem watercolors!  Out of curiosity, I tried these on white watercolor paper, and they aren’t as vibrant on this paper.  Black cardstock is what you need to use them on.

Image4

I pulled out a tube of white watercolor paint and watered it down to spatter it all over my panels.  I love this look!  I need to remember to do it more often.

Image5

After all my paint spatters were try, I pulled out my Faber Castell colored pencils to color over the white pigment ink.  This created a softer look than my watercolors.

Image6

Next–and there are a lot of “nexts” involved in this card–I used the Lawn Fawn Fancy Borders die to cut the sides of my panels.  I wanted to add some MFT Black & White Stripes paper on this card as well.  I love how the black stripes peek through the lacy border on this panel.

After I adhered my panels onto pink card bases, I wanted to add a little bit more to my cards.  On the first card, I added silver sparkling confetti with a little Multi Medium Matte glue.  Because the confetti mixes don’t have little holes in their centers, I’m starting to prefer them to sequins.  And the confetti is so much easier to glue down.


Image9

On the second card I used Nuvo Crystal Drops in Sherbert Shimmer.  I don’t know which card I like better, but it’s going to be fun to send these out in the mail!

Image10

Here is the video I created for this card.  You can watch it here or on my YouTube channel in HD.

Thanks for visiting my blog today!  Have a wonderful week!!  Bye!

Uncategorized

Valentine’s Day Card 2018 using Gina K Stamp Set and Gina K Products Haul

Hello!!  Welcome to my blog!  This is my first Valentine’s Day card of 2018.  I think Valentine cards are my favorite kind of cards to create.  I’m using some fabulous new products for this card.  I took a little jaunt up to Wisconsin to Gina K’s shop called Village Paper and Ink.  It was only an hour away from where I live in Illinois.  I don’t know why I didn’t visit her store a long time ago!  I wanted to buy some new cardstocks, and I heard that her cardstocks were absolutely lovely.  And it’s true!!  I am loving her cardstocks; they are heavy-weight and luxurious.  I would highly recommend them!  At her beautiful store, I felt like a kid in a candy shop; there were so many beautiful products to look at.  She also displayed her card creations all around the store–they were so fun to see!  Below is a picture of the products I purchased there.

Image1

For today’s card, I’m using a stamp set I purchased at her store, and it’s called Sophie Pig.  It’s so adorable!  I’m stamping the pig image first that onto a Lawn Fawn Lacy Heart Die cut.  I want my pig to be in front of the other images I’ll be stamping.

Image2

I used some Inkadinkado masking paper on my pig so I could stamp my other images over him.  Then when I pull off my mask, he appears in the forefront.

Image3

I inked on some Distress Oxide ink called Worm Lipstick onto my next panel.  I wanted this pink color to peek out from behind my heart.  I still wanted some white space on this panel, so I was careful not to go too close to the edges.

Image4

I played with my Copic markers a lot to figure out the coloring for these images.  I keep my favorite color combinations in a notebook so I can refer back to them.  I love how this pig turned out!

Image5

I’m adding detailing to my images with a white Uni-ball Signo pen.  On one of my white lines, I applied the ink too thickly.  After it dried, I was able to scrape it off with a craft knife.  Then I added more brown marker to it.  I used a couple of my Blick alcohol markers to color in the mud.  My collections of alcohol markers consist of Copic and Blick markers.  I can’t really tell the difference between the two brands.

Image6

For the umbrella and mud puddle, I’m using a new product to me called Nuvo Crystal Glaze.  This adds some nice shine to my images.  This product is very similar to Glossy Accents.

Image7

I wanted to pop up my heart with some fun foam for a little dimension.  Skor tape is my choice of adhesives to use with fun foam.  It’s super strong!

Image8

I heat embossed the sentiment, Hogs & Kisses onto a strip of cardstock with white embossing powder.  I cut it down into a banner shape and adhered it to my card front with my tape runner.

Image9

I have some heart accents that I added to my card as well.

Image10

In the picture below, I’m tilting the card so you can see the fabulous shine of the Nuvo Crystal Glaze.  I love this stuff!

Image11

Lastly, I remembered to add rosy cheeks to my pig.  I didn’t blend them out because I wanted them to be very bright.

Image12

Here is the video of how I put this card together!  You can watch it here or on my YouTube channel.

I hope you enjoyed this card tutorial!  Thank you for visiting!!

Supplies:

Neenah Solar White Cardstock, 80 pound

Lawn Fawn Lacy Heart dies

Sophie Pig stamp set from Gina K

Red Velvet cardstock from Gina K

Sizzix Big Shot die cutting machine

Mini Misti

Signo Uniball white gel pen

Nuvo Crystal Glaze

Distress Oxide – Worn Lipstick

Fun Foam

Alcohol Markers:

Pig – Copic E000, R00, R11, R22, R14

Mud – Blick 086, 002

Umbrella – Copic R22, R14, R24, C4, C 7

Uncategorized

Masculine Birthday Cards

Happy Monday to you all!  I’m finally posting another card video on my blog and YouTube channel.  After Christmas I got a really bad cold, and I’m just trying to get back into the swing of things.  I have a birthday coming up this month that I needed a masculine card for, so I decided to make up a bunch of masculine cards for my stash.

These were very fun and quick to put together.  I received a bunch of block stamps from a dear friend who didn’t want them anymore–and I’m talking about a BUNCH of stamps–lol!  I went into a card making frenzy with all of them.  This card is one of the many designs I came up with.

I pulled out some inks that would be suitable for a masculine card and started stamping out the solid circle first all over my card panel.  Both my card panels are Neenah Solar White 110 lb cardstock, and I cut them out using a faux-stitched die.

Image1

Next I used the outline stamps to very messily stamp around each circle.  I thought this added to the modern feel of the card.

Image2

I did the same with my square stamps.  I stamped the squares in a wonky row alternating the colors and then used the outline stamp with black ink.

Image3

Image4

I love how messy and fun these panels turned out!  For the sentiment, I pulled out some black cardstock and some white embossing powder.  I like the look of white embossing powder on black cardstock.

Image5

I die cut the sentiments with a faux-stitched banner die and attached everything together with dry adhesive.  For my card bases, I used more black cardstock.  You could add a white panel of cardstock inside the card for a place to write the sentiment or you could use a white gel pen to write your sentiment onto the black cardstock.  I’m planning to use the white gel pen–it looks really fabulous on the inside of the card.  I added some flat enamel dots to brighten up the black cardstock and that completed my cards!

Image6

Below is the video I created for these cards.  You can watch it here or on my YouTube Channel.

Thanks for visiting, and Happy New Year to you all!!