Uncategorized

Valentine’s Day 2017 Card Series No 6 – Valentines for your Besties using Copic Markers

Happy Valentine’s Day!  This is the last card of my 2017 Valentine’s series.  I thought it’d be fun to design a card to send out to my besties.  One of the sentiments in this stamp set called Love Notes from Neat and Tangled caught my eye–it says, “that we are friends.”  This is what sparked the idea to send out cards to let my besties know how much I love them.

image1

The coordinating die set is fabulous too because it cuts out the “love” sentiment and also a matte or a shadow for it.  A lot of love dies debuted recently, but I like this font the best–it’s so pretty.  It’s a set that you can truly use all year round.  I try to chose sets for my collection that have versatility.

I did some simple Copic coloring on the love die and the rose.  I wanted the love die to have an ombre effect, so I used red and pink Copics.  I blended them where they met, so there were no hard lines.  I kept the die in the paper to hold it in place while I colored.

image8

The coordinating rose die cut it out right at the edge of the image.  I used a Memento black marker to color over the sides, so no white would be showing.

image3

I wanted a scalloped panel to attach all my elements to, but I don’t have one in my stash.  I hooked up my Silhouette machine to my laptop and created one.  It wasn’t cutting out properly; it didn’t cut all the way through the paper.  Then I remembered I hadn’t cleaned out the blade for a while.  The thin, white cap unscrews and exposes the blade, so you can wipe it clean from all the paper fibers that build up.

image4

After that, it cut out cleanly again.  Here is a free link to the file if you’d like to have this.

Silhouette format download link below:
Silhouette A2 Scallop matte download link

DXF format download link below:
DXF format A2 Scallop matte download link

image5

I glued all my elements onto the pink panel with Multi Medium Matte glue.  I don’t bother with putting a needle thin nozzle onto the bottle anymore–I could never get it to flow.

image6

For some sparkle I added some Simon Says Stamp Assorted Moonshine sequines to the card.  I also painted over the love die cut with my Spectrum Noir Sparkle glitter brush

image7

Here is the video of how this card came together.  You can watch it here or in HD on my YouTube channel.


Thank you for visiting Jackie’s Craft Table!!  Happy Valentine’s Day!!


Here’s my supply list:

Neat and Tangles stamps and coordinating dies: Love Notes

Uncategorized

Valentine’s Day 2017 Card Series No 5/Colored Pencils/Penny Black Stamp

Welcome back for yet another Valentine’s day card!  I’m using a small stamp set from Penny Black called XOXO.  I just fell in love with this darling girl–she’s cute for Valentine’s day, but I think this set could be used throughout the year.

image1

Coloring with colored pencils on kraft card stock is a lot of fun!  If you’ve never tried it, I would highly encourage you to give it a try.  It creates such a vintage, charming look.  I used both Faber Castells and Prismacolors to color it in.  I love both brands, but Faber Castell Polychromos pencils are my favorite.  The reason I used both is because my set of 36 Faber Castells doesn’t include any skin tones.  Also, the Prismacolors tend to build up over the lines of your stamped image.  To get around that you can re-stamp your image when you’re done coloring, or be careful not to color over the lines.  I usually prefer re-stamping my image, but this time I was just careful not to go over the lines.  I only used them on her skin, so it was easy.
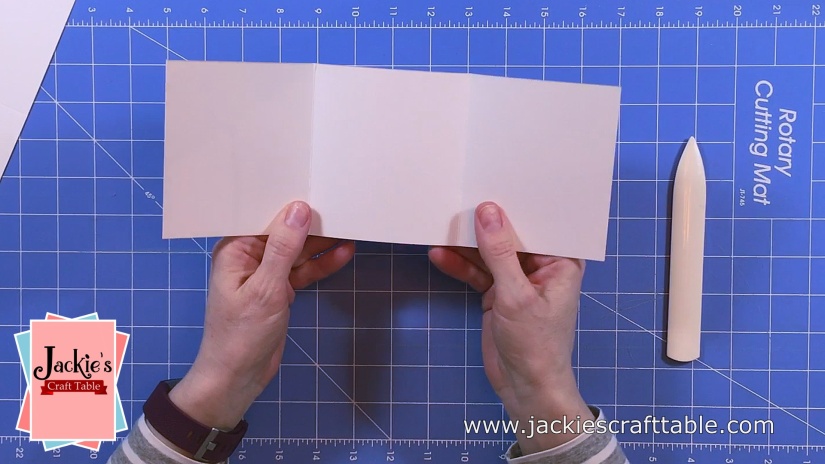
image2

I also used a white gel pen to add highlights to her dress, boots and flowers.  It helped make the image pop.

image3

I used the sentiment that came in the set to make my own strip of pattern paper.  I used my mini misti to help me out with this.  I ended up inking up all the stamps I used for this card at least twice–many times more on the little girl.  (Time for a new ink pad for me.)

image4

I also pulled out my dusty Silhouette cutting tool.  I absolutely love this machine; I don’t know why I don’t use it more often!  Oh ya, it’s because I’m lazy and don’t want to have to plug things in.  Lol!  I prefer using dies and my Sizzix.  For this card I wanted a scalloped strip, and I don’t have a die like that, so I thought I create one.  I’m slowly building up my die collection.

image5

Here is the cute scallop!  Pulling out my machine and plugging it into my computer and the wall wasn’t too painful.  Lol!

image6

And here’s a close-up of my finished card!  I added a bit of twine as well.  I don’t know why I always think of this after I have adhered my panel onto my card base.  The Tombow stamp runner I use is very forgiving.  I was able to pull it off without ripping anything.

image15

I also included a short segment of me cleaning my poor, neglected Mini Misti!  I love this tool, but somehow I let ink build up on it.  Here is the before picture of how dirty it was.

image14

I used some Novus Plastic Cleaner on it, but my misti was too far gone for that.  I then found a rusty tin can of Oops! Multi-Purpose Remover.  It took a bit of elbow grease to rub it all off, but that did the job.

image9

While I was showing my Mini Misti some love, I thought I’d also go ahead and laminate one of the sheets of grid paper and use that in my Misti.  This was a tip from Jennifer McGuire, and I love it!  If I get ink on it, it wipes clean.  I make sure I wipe it down, along with the rest of the Misti, when I’m done using it for the day.  I use the Novus plastic cleaner for both.

image12

Here’s the video of how this card came together.  You can watch it here on my blog or on my YouTube Channel.

Thank you for visiting my craft table!  Have a wonderful day!


These are the supplies I used to create this card:

Colored pencils:

Faber Castell Polychromos:

Dress: Light Green – 171, Emerald Gree – 163, Rose Carmine – 124,Deep Scarlet Red – 219, Magenta – 133, White

Boots: Burnt Ochre – 187, Raw Umber – 180, Walnut Brown – 177

Hair: Prismacolor Yellow Ochre – 942, Faber Castell – Burnt Ochre – 943, Prismacolor Mineral Orange – 1033

Skin: Prismacolor Seashell Pink – 1093, Prismacolor Rosy Beige – 1019, Faber Castell  Burnt Ochre – 187

Uncategorized

Valentine’s Day 2017 Card Series No 4/Polychromos Colored Pencils

Welcome back for another Valentine’s Day card!  Today I made a fun tri-fold card.  I used my fabulous Faber Castell polychromos colored pencils.  I’m liking these more than my Prismacolor pencils, which is saying a lot.  I’ve been a Prismacolor devotee since I was a teenager, and I will always love them, but the feel of the polychromos pencils and their blend-ability is just exceptional!  I have the set of 36, but I’m putting the complete set of 120 on my wish list.

valentine_2016_series_no_4-thumb

I made this card with an Art Impressions stamp set called Sweet Wishes.  It’s kind of like a little card kit–it comes with stamps, dies and very clear instructions on how to make this tri-fold card.  Art Impressions has so many darling stamps–love them!!

image1

The paper I used is the 110 pound version of Neenah Solar White, and I cut it in half at 4 1/4, so I could get two cards out of one sheet of paper.  The card is a little bit smaller than your average A2 card (5 1/2 by 4 1/4).

image2

I used my Mini Misti so I could get the placement and impression of my images perfect.  I ended up stamping each image at least twice.

image3

The stamp set comes with two dies.  The first one cuts out the negative space inside the rose wreath.  The second cuts and scores the mailbox door so that it can open and close–so darling!!

image5

Below, I’m coloring in the mailbox, and I used colors on this image besides the usual gray and black. The gray and the black looked kinda bland to me, so I added magenta and light ultramarine which gave the image a lot more interest and charm.

image8


Here’s the video of how I put this card together.  I hope you enjoy it.  You can watch it here on my blog or in HD at my YouTube channel.  Thank you for visiting my craft table!


Here’s a list of the supplies I used:

Faber-Castell Polychromos pencils:

Deep scarlet red-219, Rose Carmine-124, Magenta-133, Mauve-249, Light green-171, Emerald Gree-163, Dark phthalo green-264, Earth Green Yellowish-168, Light ultramarine-140, Cream-102, Warm Grey V-274, Warm Grey II-271, Raw Umber-180, Black-199

Uncategorized

Happy Birthday Card/Masculine and Feminine Versions

I’m taking a quick break from Valentine’s Day cards to make a masculine birthday card. My supply of masculine birthday cards is completely depleted.  This is a quick and easy card–no coloring involved.  I had so much fun making this card, I went ahead and made a feminine version of it.

happy_birthday_masculine-feminine_thumb

It all started with this fun die from MFT Stamps that came free with a purchase I made a few months ago.  It’s been sitting unloved in my stash till now–I love this die!!  It’s called Stepped Up Chevron.  Not only is it cute, but it helped me use up some of my scrap paper I have sitting in a box next to my craft table.

image1

This card could easily be mass produced.  Once I placed my sentiment stamps where I wanted them on my card panel, I used my Mini Misti to stamp up several panels.

image2

I used Multi Medium Matte glue to adhere my die cuts onto my cards.  I inevitably put on too much, and it oozes out from under my die cuts.  I love this glue because it dries matte, and you can’t tell I used too much.

I also used some pretty enamel dots.  They didn’t match the colored card stock perfectly, but they were close enough, and they gave the card another fun element.

image4

Here’s a picture of the feminine card before I trimmed off the chevron die cuts.  These cards just look happy.

image5

I finished off the insides of these two cards as well–something that I’m going to do more of this year.  It was fun, and it really finished off the cards.

image6

Thank you for visiting my blog!  Hope you get a chance to create some of your own cards today!  Bye!!

Here’s my video.  Hope you enjoy it!!  You can watch it here or in HD on my YouTube Channel by clicking Here.


Here’s my list of supplies I used for this card: