Uncategorized

One Layer, Fall Themed Thank You Card using Prismacolor Pencils

Hello and welcome!  It’s been a lovely, warm fall here in Chicagoland, but the weather is turning cold now, and there are a lot more leaves on the ground.  I felt inspired to revisit one of my favorite stamp sets from Lawn Fawn called Jump for Joy.

I intended this to be a quick, one layer card, but it was a little more work intensive than I had planned.  At least it looks clean and simple.  Lol!

I started out with a piece of Neenah Solar White 110 pound cardstock cut to 8 1/2″ by 5 1/2″ and scored at 4 1/4.  I stamped my animals first and put masks over them.

Image1

I used the solid stamps that came in this set to stamp the interior of my leaves–hoping to save time.  However, the ink stamped out blotchy, so I had to color over them with some Prismacolor pencils.

Image2

Then it was time to color in my animals with more Prismacolor pencils.  I love the Neenah Solar White cardstock, but it’s not my favorite kind of paper to color on using my Prismacolors.  With this paper you are kind of limited to how many layers you can put down before the paper won’t accept any more, and I love using lots of layers of colored pencil.  However, since this is a clean and simple card, it worked out with just a few layers.

Image3

I added a few embellishments to my leaves and sentiment using a pencil and a Copic Multi-liner.  To indicate movement, I added little dash marks to the leaves.  On a trial run of this card, I used some blue colored pencils, but it complicated the card, and I wanted a lot of white space on my card.

I always make a first draft for each of my cards–it helps me to figure out my final layout.  On my first draft for this card, I didn’t have as many leaves which didn’t require any masking.  On my final card I stamped a lot more leaves and used masked to be able to stamp some overlapping.  This looked better and added more dimension.

I also wanted to elongate my sentiment to give the card more balance, so I drew in some curvy lines and drew over it my the multi-liner.

Image4

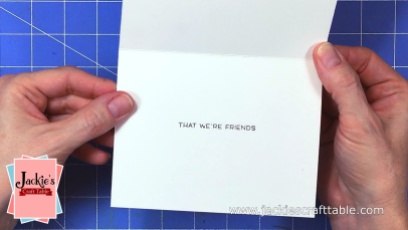
I also added a sentiment on the inside of the card, which says, “That we’re friends.”


Now I just need to make a few more so that I can send them out to a few of my dearies.  Don’t you just love getting happy mail!!

Hope you all have a fun Friday and a wonderful weekend!!  See you soon!

Here’s the video I created for this card.  You can watch it here or on my YouTube Channel.

Uncategorized

Witch Way is the Candy Card using Inktense & Polychromos Pencils

I simply couldn’t resist this adorable stamp set from MFT.  Too cute!!  I couldn’t settle on one medium to use on it, so I colored it in with Inktense watercolor pencils and polychromos pencils.

I used Arches cold pressed watercolor paper for the Inktense pencils–this is a lovely cotton-like paper that will take on a lot of water.  I used Strathmore Colored Pencil paper for the polychromos pencils.  This paper is new to me, and I loved coloring on it a lot better than on smooth white cardstock.  This colored pencil paper has more tooth to it, and it pulls the pigment from the pencils a lot better.

I also used two different kinds of inks.  I used VersaFine Onyx black ink on the Arches paper.  This ink is waterproof and leaves a very strong pigment on the paper, so it can ink up easily over the textured paper.  I used my favorite Simon Say Intense Black Ink on the colored pencil paper.

I stamped the cat first, masked it and then stamped the witch, the frog and the pumkin.  I wanted them all grouped closely together.

Image9

I taped down my watercolor paper onto a board with some low tac tape.  This helps prevent the paper from warping.  I colored in the image with my inktense pencils and shown on the left.  After all the coloring is done, I used my watercolor brush to melt down the watercolor pencils.  Look how vibrant these Inktense pencils are!

Next, I colored in my second panel with some Faber Castell colored pencils.  I used Gamsol which is an odorless mineral spirit to add vibrancy to my colored pencils.


After my panel where finished, I picked out some pretty Halloween pattern paper to matte them, and my cards were complete!

Below is the card video for these card.  You can watch it here or on my YouTube Channel.  Thank you for stopping by!!


Uncategorized

MFT Super Hero Trick-or-Treater/Halloween Card Series 2017

I’m having so much fun creating Halloween cards this year!  Here’s my second card in this series.  This card could also be used as a birthday card, which is what I’m planning on using it for.

SuperBoy_THUMB

I created a piece of pattern paper first.  To do this I stamped the stars with some VersaMark ink, poured on my white Hero Arts embossing powder, and then melted it with my heat tool.  I used my favorite Candied Apple Distress Ink and blended that all over my card panel.  The panel turned out so bright and cheery.  After I applied all the ink, I made sure to wipe off the ink from the embossed stars to make them brilliant white once again.

Image14

On another white panel I stamped the little superhero and created a mask for him so I could stamp some clouds behind him.  I stamped the smaller cloud higher so it looked like it was more off in the distance behind him.

Image15

I pulled out some Copic markers for this panel, and did some very simple coloring using primary colors.  The colors I used are listed below.  I wanted him to appear as if he was flying, so I drew in some motion lines under him with a Copic Multiliner.

Image17

Here’s the video on how I created this card!  You can watch it below or on my YouTube channel.  Thank you for stopping!!  Happy Halloween!!


Copic Markers used to color in my images and sky:

Skin: E11, E00, E000

Hair: E35, Y26, Y02

Mask and Pants: Y17, Y15, Y02

Shirt: BG05, B24

Cape: R14, R27, R89

Clouds: C4, C1, C00

Sky: B000, B0000


Here’s a list of the supplies I used to create this card:

MFT Happy Haunting Stamp Set –
Memento Tuxedo Black Ink – http://amzn.to/2wEv0vt
Black Licorice Cardstock – http://amzn.to/2wCrbIQ
EK Success Cutter Bee Precision-Cut Scissors – http://amzn.to/2w2DI4Q
Recollections Halloween Book Pattern Paper Pad 12×12 –
Bristol Smooth Cardstock – http://amzn.to/2x7TSPb
VersaMark Ink – http://amzn.to/2x89L8y
Hero Arts White Embossing powder – http://amzn.to/2gCXvlq
Heat tool – http://amzn.to/2xLKPAF

Foam Blending Tool – http://amzn.to/2x8jSKt
Copic Markers – http://amzn.to/2vIFkFD

Kokuyo Dotliner strong adhesive Tape Glue – http://amzn.to/2j0sYTj

Neenah Solar White 80# Cardstock – http://amzn.to/2jeDuGz
Candied Apple Distress Ink – http://amzn.to/2gU28eY
Copic Marker Multi Liner Black 0.3 – http://amzn.to/2wSVQ4w
Fiskars Paper Trimmer – http://amzn.to/2eOQXQi
Post-it Super Sticky Full Adhesive Notes – http://amzn.to/2gVspWl